With the 'game changing' introduction of DSLRs, it has made it possible for anyone to pick up a relatively cheap camera and shoot some high quality footage. It is something that would not have been possible a few years back without access to an expensive camera or biting the bullet on the camera hire costs.
I have heard a few people recently complaining that now 'anyone' can pick up a camera, point & shoot, 'it has saturate the market with wannabe film makers'. It has given amateurs the access they needed to think they could possibly be professional (how dare they?). It has meant they have improved the quality of their work and now could be considering a career in film making...(a market that is notoriously over stretched with people trying to 'make it' and does it really need to be stretched any further?).
Experience is everything in this game, the more experience you can get playing with a camera by yourself, the better you will be at knowing what works and what doesn't! How else can you learn?
In my opinion, you have to commend ANYONE who has the notion to pick up a camera and decide to give it a go. We need more of this attitude. People generally don't understand just how much work is really involved in making a film (I don't even mean making a good film...I mean 'any' film). It is so difficult just to keep focus on the story and try to control everything that is going on in a sequence, while staying on schedule and budget that anyone who gives this a go should be congratulated and not put down.
Its far too easy to tear strip off other people when you are not performing well yourself. If you are on of those who believe the world owes you a living and any new comers trying to become directors are just ruining your own chances, then I would suggest that you are exactly the type of person you are complaining about...YOU are saturating the market!
Be proactive, push yourself further and stop worrying about what everyone else is doing. Have your own game plan and go for it! Contrary to popular belief, not every director has made it because of their industry connections, but because of their hard work, unshakable commitment and ultimately...talent!
This country is starting to realise that it can produce independent films of such quality that they can rival the big film studios. And this can be done while flying in the face of economic strife and even while the UK film council is in dire trouble...there are always talented people out there willing to pick up a camera and learn the craft. That has to be admired in my view, because this is exactly the type of passion and stubbornness that you need to make a film in the first place. Can you imagine if Spielberg had never bothered to pick up a camera?
All these new people now trying something that they were not previously able to try will naturally mean a more saturated industry. But it will also mean that current directors will have to try harder, push boundaries further, be more experimental and creative than ever before...just to try and stay ahead. The wolf climbing the hill is not as hungry as the wolf on top of the hill. Ultimately it will make for a much stronger UK film industry and that can only be a good thing right now.

Showing posts with label film camera. Show all posts
Showing posts with label film camera. Show all posts
Tuesday, 23 November 2010

Sunday, 1 August 2010
The best way to mount a camera to a car


Generally the lighter the camera, the more stable it will be with a minimum of support. Heavy cameras tend to need strong cheeseplate rigs that have multiple supports to brace from. They also need to be fairly level and so some extreme angles are a bit more tricky to achieve. But this cheeseplate from Filmtools has a full sized ball leveling head on it that is easy and quick to change the camera angle.

The biggest problem you need to combat when mounting a camera is bounce. You really need to try to brace the rig so that it is solid and does not have any movement in the camera and ultimately the image.

Suction cups always need a fairly flat and clean surface. Unfortunately, modern cars have a lot more curves and less flat surfaces, therefore, it is very useful to have a variety of differing suction cup sizes (4", 6" and 8" cups). This way you can now mount off small flat surfaces like the sills of the car or a spoiler and this opens up a greater possibility for camera positions and stability.


For a strong and solid mount, try not to brace off the bumpers of the car. Bumpers these days tend to be plastic and naturally are designed to have movement in them. In the past I have braced a camera off a bumper and as soon as the car hit a bump in the road, the camera wobbled violently and made the image unusable. It is OK to use bumpers for additional support to the main brace, but don't use as you main fix points.
I have been using the Canon 7D to film most of the car work as it is small, light and very flexible to put in most positions. Using the 7D is great, but if you don't mount a solid grip then you will get the 'jello effect' that has been so widely documented. This is even more important if you are mounting a bonnet camera because as soon as you start the engine, you have a lot of vibration that transcends into the image sensor of the camera and that can completely ruin the footage. Its another reason that I favour the 7D over the 5D mark 2 for this type of work. The 5D has a slightly larger image sensor and therefore is slightly more unstable when it comes to vibration in the sensor - and these cameras are subject to quite a bit of turbulence and vibration when driving at speed off the side of a car and an uneven surface.

Recently I mounted a bonnet cam on a chase car in order to film the new Fabia Vrs from the rear. I had always favoured a tripod mount that triangulates a solid footprint, because I had always thought that this was the best and most secure way to rig the camera.


For suction kits, Filmtools.com has superior mounting equipment and pretty much everything you will ever need. However, the shipping costs can be high as the equipment tends to be fairly heavy, so always check first. A good UK based alternative is Cameragrip.co.uk , but their range is a little more limited and not as adaptable.
Thursday, 22 April 2010
Microsoft car shoot


This was the first test shoot with the new Canon 7D rigged for film and so I was quite excited to see how it would perform under extreme conditions.
Usually when filming at speed you get a lot of vibration which makes the images distort. On this particular shoot the 7D was fine and I was impressed by how the image was not affected when I used the stabiliser on the zoom lens. If you are using prime lenses with no stabiliser then expect some vibration. More recently I shot a bonnet mount on the new Audi A4 and I used a nice 24mm Carl Zeiss 2.8f prime lens to get a nice depth of field, but the vibration from the engine alone was enough to cause problems with the image. There have been lots of reports about the HDSLRs having a 'jelly' effect on the image sensor when the camera is shaken about and this was certainly the case with the A4 shoot. Therefore I would recommend that you sacrifice the depth of field and use a lens with a built in stabiliser.
Overall the 7D performed way above my expectations and you only really notice that when you are looking at the rushes. It allowed some great 50fps footage to be shot and again this helps in the edit to slow down any bounce. In fact the only problem I really had was the lousy weather.

When you are shooting low angle out the back of a moving vehicle at speed and on a wet surface, you have a very limited amount of time before your lens is covered in gunk and water. So you are constantly wasting time cleaning the camera and the lens. A few solutions to this are to drive slower or move to a country where it doesn't rain for ten months of the year!
The only other thing that the 7D needs is a monitor. The viewfinder at the back is a great feature and as it has a live mode it allows you to point and see what you are shooting. However, the viewfinder is only a guide and while the images may look sharp on it, once you get it back to the studio, they may have been soft - and that's upsetting!
Of course the viewfinder is on the back of the camera so if you have the camera out the back of a moving car, then your head has to physically be behind it to see it, which can be impossible or even dangerous in some situations.
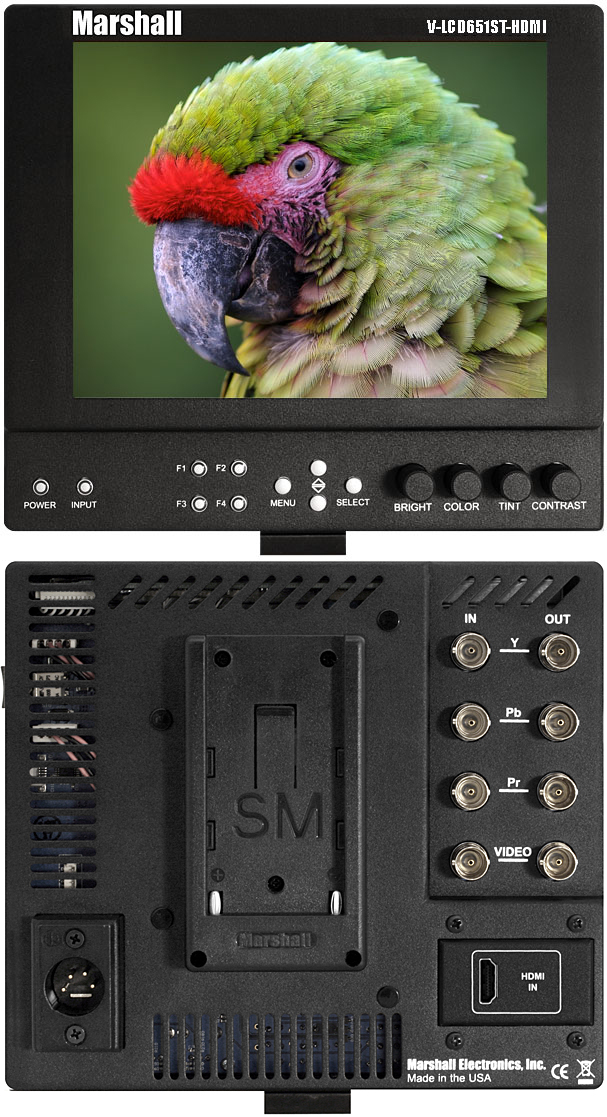
The solution to all this is an external monitor like the Marshall V-LCD651ST-HDMI. It has a 1024x768 resolution and can easily connect to the hot shoe of the Canon that allows it to be positioned in any direction. But more importantly it has an in-focus filter that actually allows you to see when your image is in focus or soft. It also has an exposure filter that allows you to see if the subject is correctly exposed. It has great playback in a higher res than the viewfinder with an anti reflection screen. In short this should be the answer to most of the problems I came across on the shoot...that and a nice spell of sun!
Monday, 23 November 2009
Shoot always at 4k... but edit at 2k
Most edits, even for the big screen, are created at a resolution of 2k (2048 pixels x 1080 pixels).
However, if you shoot at 4k you have a few advantages. Firstly you have the same depth of field that you get when you shoot on 35mm film. That should already be reason enough! But for me personally, the real bonus of shooting at 4k is that when you edit in 2k you have an oversized image. This might sound like an unnecessary waste of file size and storage, but when you are editing your footage, it means you can change the crop, zoom in and out of the image or even take out any camera moves with steadying effects.
There is a particular shot in Light Rain (below) where we have a slow and steady zoom into Jade's face. This was created completely in post with a slow up-scaling of the image. As the image was originally shot at 4k, we don't lose any of the details or get any unwanted pixilation. This was a real life saver in the edit as the slow move really helped the shot. This really makes it worth shooting at 4k...even with all the extra storage headaches and workflow problems you will incur.

The digital media is recorded on to a 320GB hard drive (approx 3hrs at 4k), or 8GB CF Cards (approx 4 minutes at 4k). As it is a tapeless format, the data needs to be backed up on to portable drives and so a good DIT is always recommended with an onsite laptop and backup drives.
The RED One records the data as a R3D RAW file, which is basically the video equivalent of RAW files in stills photography. This means that you have much more flexibility with color correction and adjusting different levels in post-production without being destructive to the image.
The huge file sizes that 4k will produce can be really problematic in your workflow. Therefore it is best to create an offline edit (low res version) and edit all your content from there. Then once you have all your footage in the correct sequence you can take the timecodes from the offline edit and simply place them into the online edit...hey presto you have a high res edit made from your offline timecodes.
Sounds simple? Well it doesn't always go as smoothly as that and sometime cross-pollinating software is a recipe for disaster as sometimes they don’t recognise each others timecodes, but if you can work through the temporary glitches and buffering issues it will be worth it in the end. And when you see the final results, you won't want to shoot on anything other than 4k!

This is handy screensaver as a good reference for all the different format sizes.
However, if you shoot at 4k you have a few advantages. Firstly you have the same depth of field that you get when you shoot on 35mm film. That should already be reason enough! But for me personally, the real bonus of shooting at 4k is that when you edit in 2k you have an oversized image. This might sound like an unnecessary waste of file size and storage, but when you are editing your footage, it means you can change the crop, zoom in and out of the image or even take out any camera moves with steadying effects.
There is a particular shot in Light Rain (below) where we have a slow and steady zoom into Jade's face. This was created completely in post with a slow up-scaling of the image. As the image was originally shot at 4k, we don't lose any of the details or get any unwanted pixilation. This was a real life saver in the edit as the slow move really helped the shot. This really makes it worth shooting at 4k...even with all the extra storage headaches and workflow problems you will incur.

The RED One records the data as a R3D RAW file, which is basically the video equivalent of RAW files in stills photography. This means that you have much more flexibility with color correction and adjusting different levels in post-production without being destructive to the image.
The huge file sizes that 4k will produce can be really problematic in your workflow. Therefore it is best to create an offline edit (low res version) and edit all your content from there. Then once you have all your footage in the correct sequence you can take the timecodes from the offline edit and simply place them into the online edit...hey presto you have a high res edit made from your offline timecodes.
Sounds simple? Well it doesn't always go as smoothly as that and sometime cross-pollinating software is a recipe for disaster as sometimes they don’t recognise each others timecodes, but if you can work through the temporary glitches and buffering issues it will be worth it in the end. And when you see the final results, you won't want to shoot on anything other than 4k!

This is handy screensaver as a good reference for all the different format sizes.
Wednesday, 28 October 2009
Filming on the Red One

Filming on the RED was a new experience for most of the crew on the production of Light Rain. We chose to use this as opposed to the Arri D21 for a variety of reasons - the main one being cost. But with over four times the resolution of HD, for the first time a digital camera is achieving the same quality as a film camera!
The RED has a great reputation in the industry for producing images of a comparable quality to the that of a 35mm camera, so at a fraction of the cost it is no wonder that big Hollywood blockbusters like The Knowing, The Lovely Bones, District 9, Gamer, Angels and Demons (and many more) are choosing the RED over the more traditional and more expensive film alternatives.
Typical high-end HD camcorders have 2.1M pixel sensors and record with 3:1:1 color sub-sampled video at up to 30fps. RED offers the super 35mm cine sized (24.4×13.7mm) sensor, which provides 4K (up to 30 fps), 3K (up to 60 fps) and 2K (up to 120 fps) capture, and all this with wide dynamic range and color space in 12 bit native RAW. At 4K, that’s more than 5 times the amount of information available every second and a vastly superior recording quality.  There are two major benefits gained from these formats; when shooting at 4k the depth of field is the same as 35mm film, giving a look that is appreciated by most directors. When shooting 2k it is possible to shoot high speed, up to 120fps, which is the rate we shot at for al of the slow motion shots on Light Rain.
 There are two major benefits gained from these formats; when shooting at 4k the depth of field is the same as 35mm film, giving a look that is appreciated by most directors. When shooting 2k it is possible to shoot high speed, up to 120fps, which is the rate we shot at for al of the slow motion shots on Light Rain.
Even at its lowest setting, the RED One has a bitrate of around 225 Mbs, much higher than the 140 Mbs of HD-Cam and considerably higher than the BBC minimum requirement for HD material of 100 Mbs.
Jason Torbitt was my cameraman on the production of Light Rain, he has used the RED a few times now and so he had some good feedback to give...
'Once we, as a crew, became familiar with the regime of drive changes and card changes, and waiting for the camera to initialise, it was very straightforward to operate. The camera menu is thoughtfully laid out in a well-organised way, and makes it straightforward to locate and adjust settings...
Most importantly, the quality of the image and the sheer beauty of the pictures which come from the RED, for the price, are quite incredible. With a depth of field so shallow it could easily be mistaken for 35mm, and full HD images where every drop of water stands out to the human eye, it looks stunning!'
As a director using the RED was quite an effortless process. It comes with an on-board 5.6" LCD screen which is very clear, even in bright light with rain drops all over it! I could easily view the screen which is either mounted on the camera or hand-held with a 2m cable. And it was also possible to connect up to an HD Monitor where I could view the playback at a higher quality and check the framing, composition and focus.
It also had the added bonus that the lenses where easy to change. Most lens changes require quite a bit of dexterity and time, but the RED was quicker and easier which gained valuable time in change-over between shots.
However, I can't sing the praises of the RED too much. As Jason reminds me that it becomes a very bulky creature when it is fully-loaded with accessories. I remember on the day of the shoot I had allocated 30mins of stedicam work for Jason and this meant running along side the actors with a very heavy rig. I don't think I was too popular at that particular time! Add to that a production matte box, filters and follow focus, handheld work with the shoulder brace on an 85mm became a definite challenge, but at least he had a good workout!
 Jason also mentioned that there are also some minor glitches and errors which can occur, including errors with recording to the drives, or issues with capturing in post.
'There are also odd faults with differing builds. One such example is during playback. I’m told it is a problem which sometimes occurs with Build 17 – that if sound is being recorded directly into the camera, during playback of files a green flashing occasionally flashes up on the output image. This is resolved by disconnecting both EVF and the LCD, then reconnecting them...and the fault is cured!'
Unfortunately camera errors can occur on any camera, but as technology increases and brings more options and menu setting, the likelihood for errors increases. From a director's POV the worst thing would be wasting precious production time trying to fix them or wasting time trying to work out the menu screen. That is why it is an absolute MUST to have a qualified DIT on site at all times. If you choose to cut this cost from your budget to save a few pounds, you are risking everything...my advice is, don't be penny wise and pound foolish...always to have a DIT on site!
So with a good DIT available and a cameraman with hulking muscles, I think that the RED ONE is the logical choice for any director who wants to achieve a high quality finish at a fraction of the costs. I can't wait to use it again!
Subscribe to:
Posts (Atom)